How to Add / Remove Liquidity (SOL)
“Liquidity” is central to how PancakeSwap’s Exchange works. You can add liquidity for any token pair by staking both through the Liquidity page.
In return for adding liquidity, you’ll receive trading fees for that pair and farming rewards (if applicable)
PancakeSwap V3 lets you provide concentrated liquidity — meaning you choose the price range where your liquidity is active. This gives you more control and efficiency over how your capital is used.
Add Liquidity
Section titled “Add Liquidity”You can add liquidity in two ways:
- Option 1: Add to an existing pool
- Option 2: Add more tokens to a position you’ve already created
Option 1: Add to an Existing Pool
Section titled “Option 1: Add to an Existing Pool”Step 1: Go to the Pool List Page
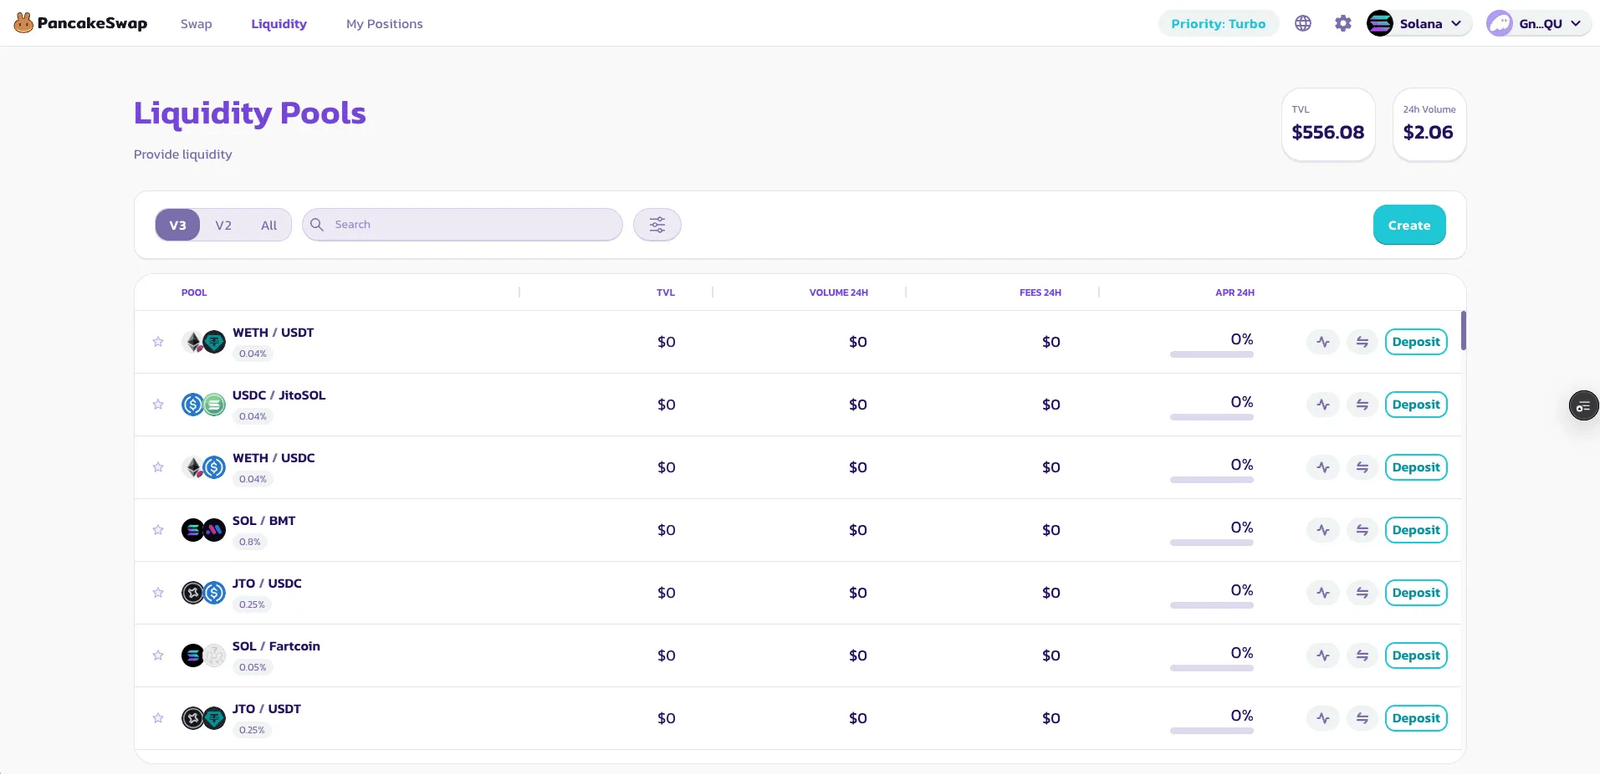
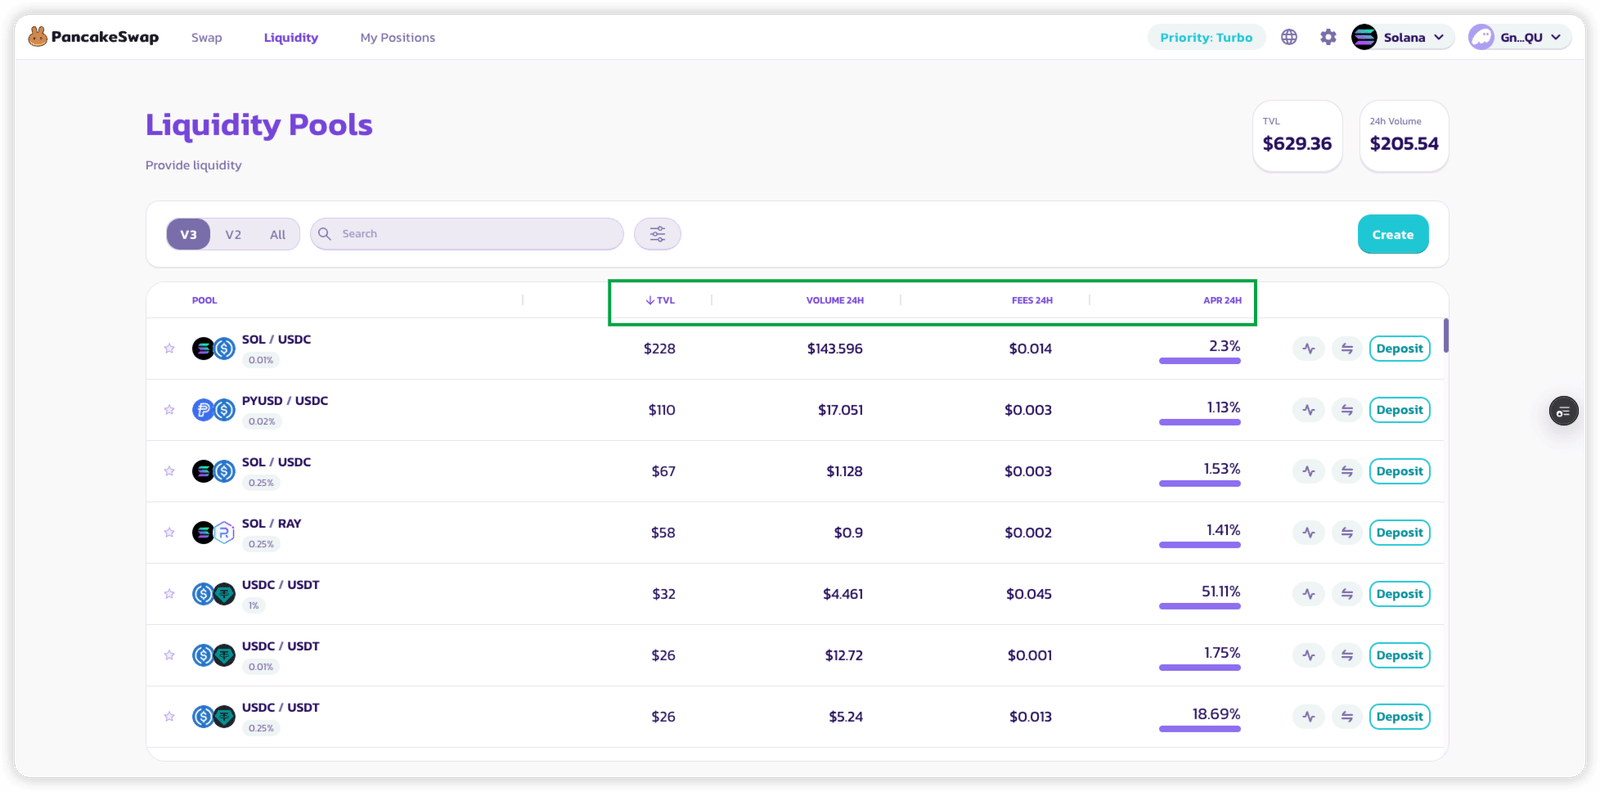
Section titled “Step 1: Go to the Pool List Page”Here you’ll see all active V3 pools on Solana.
Step 2: Use Filters to Find Your Pool
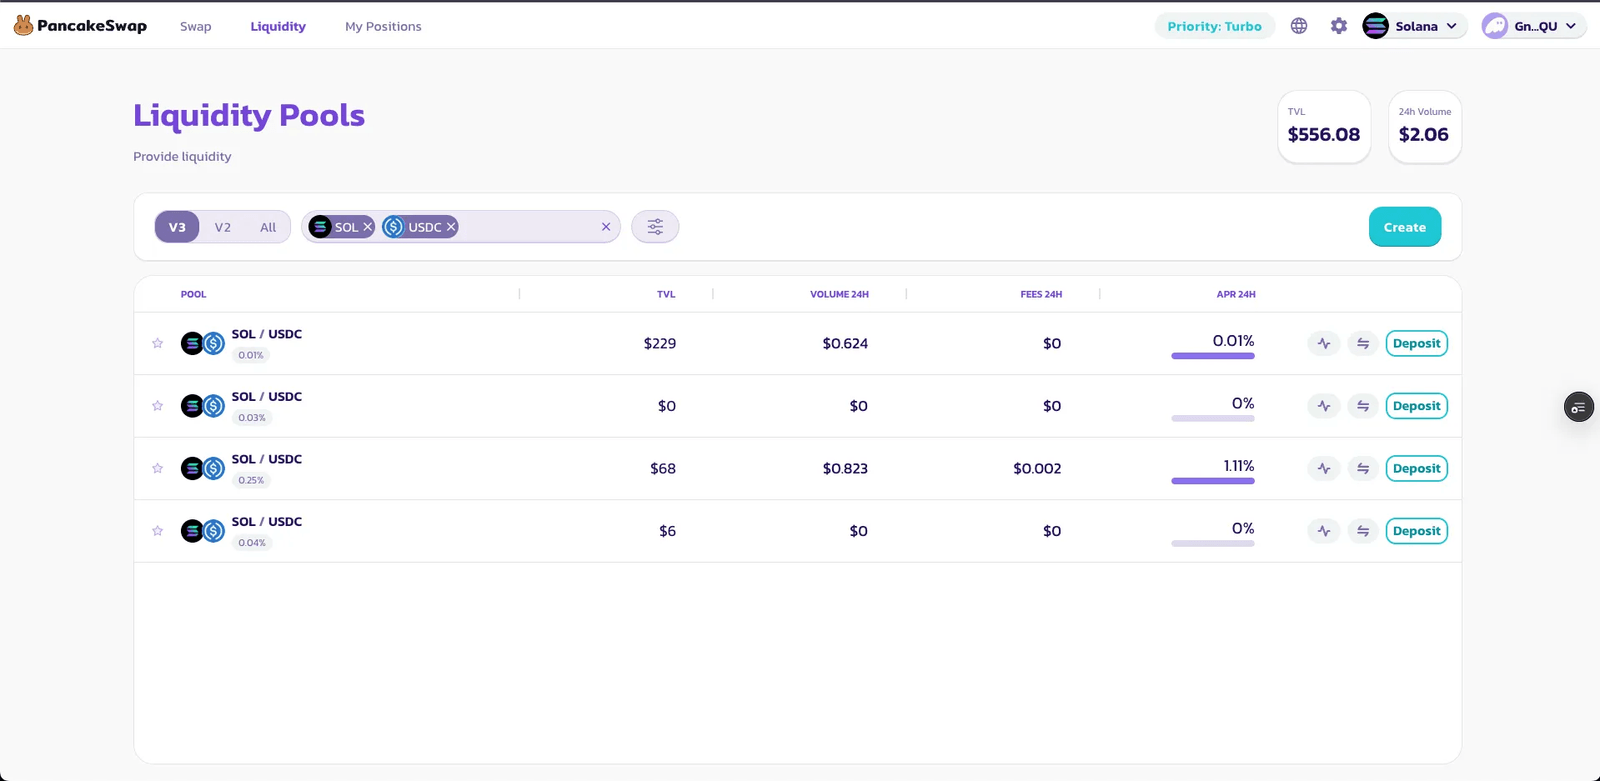
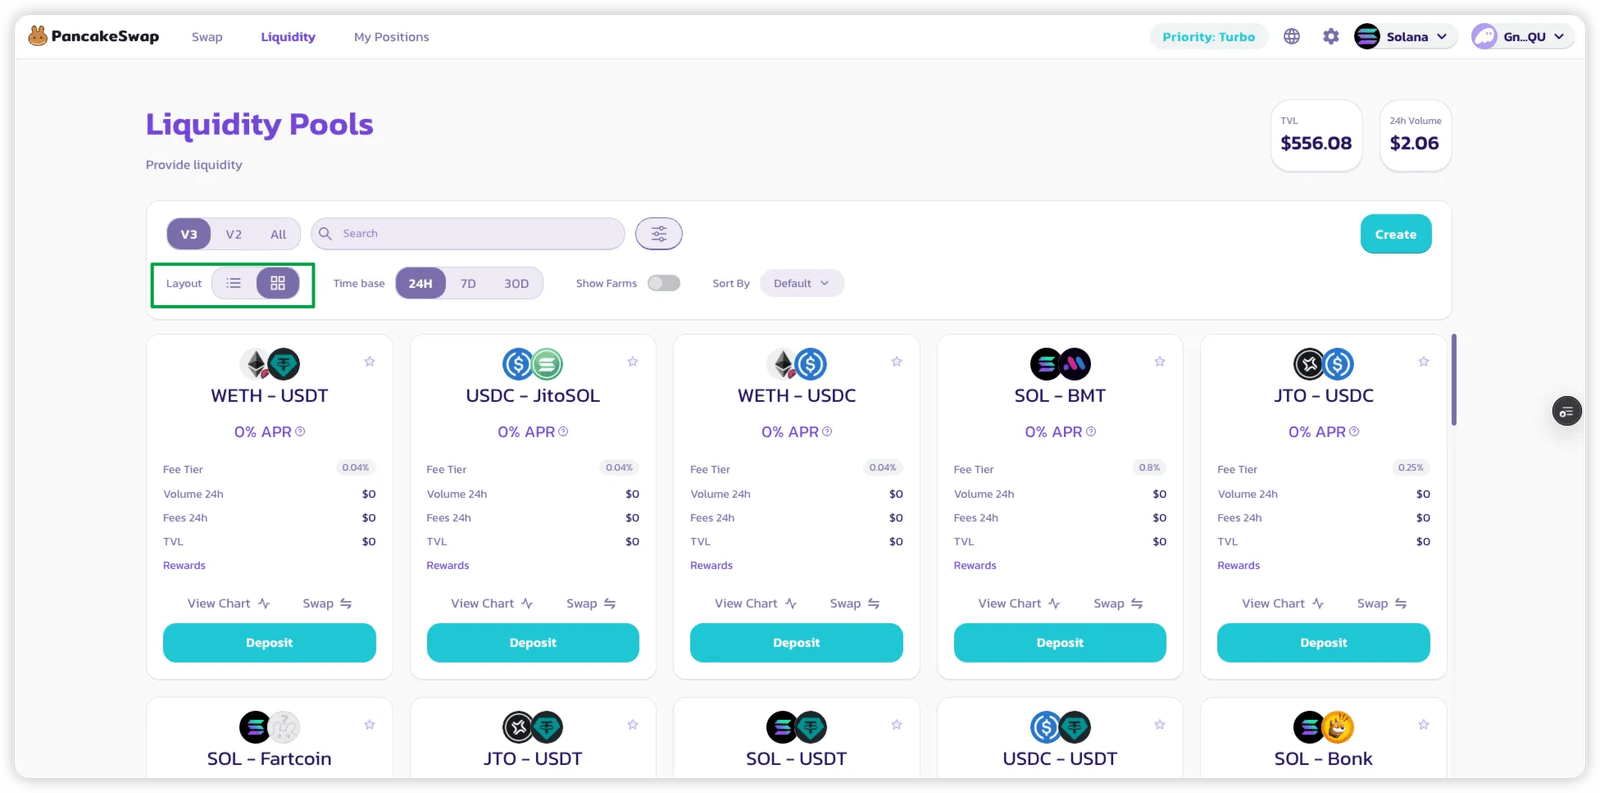
Section titled “Step 2: Use Filters to Find Your Pool”You can use the filters at the top of the page to:
-
Search for a specific token pair
-
Change layout view (grid/list)
-
Sort pools by TVL, Volume, Fees, or APR
Step 3: Choose How You Want to Add Liquidity
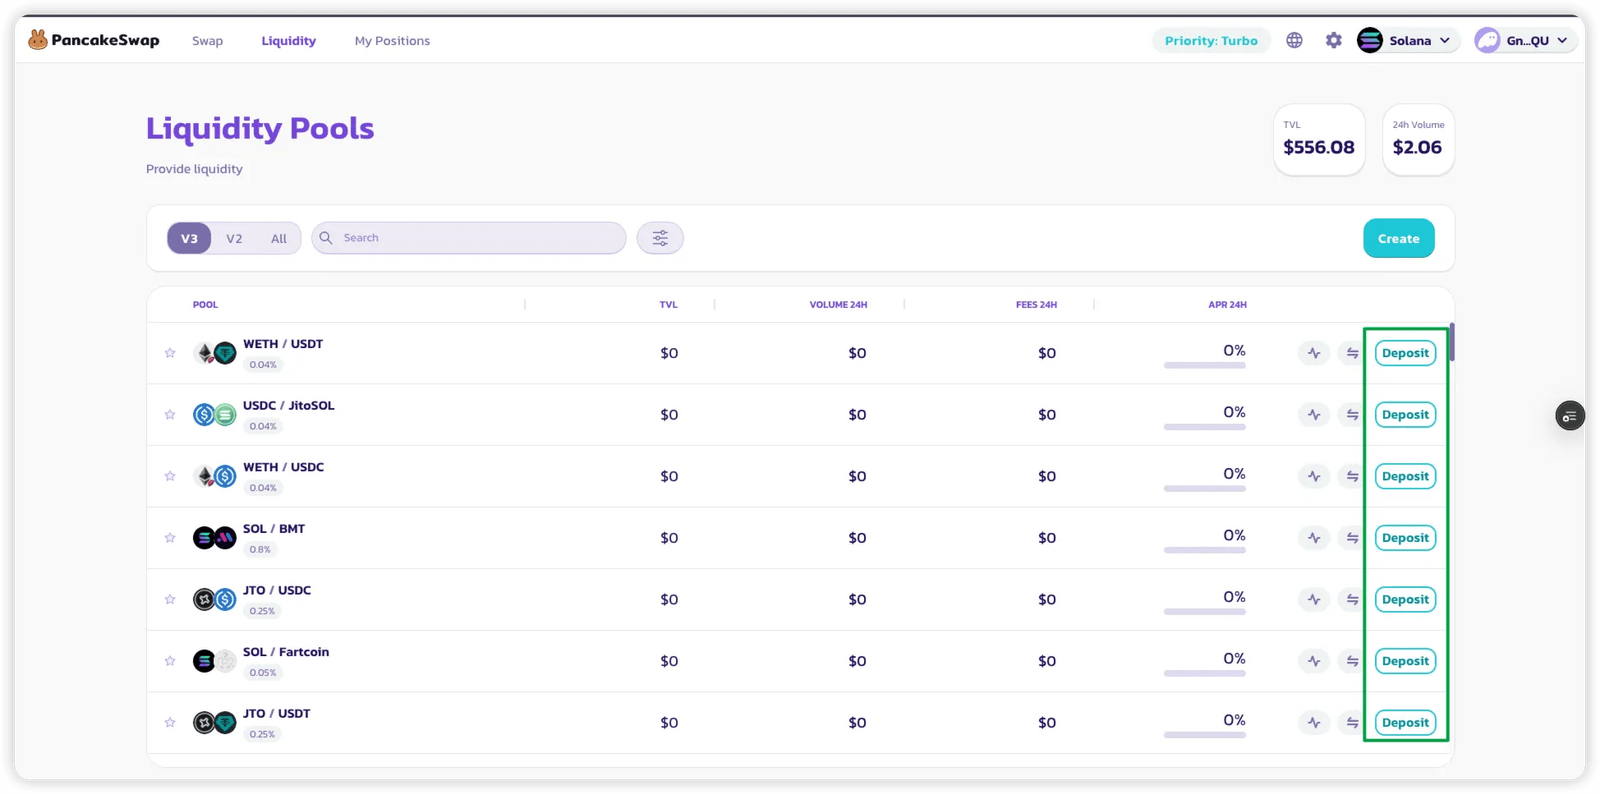
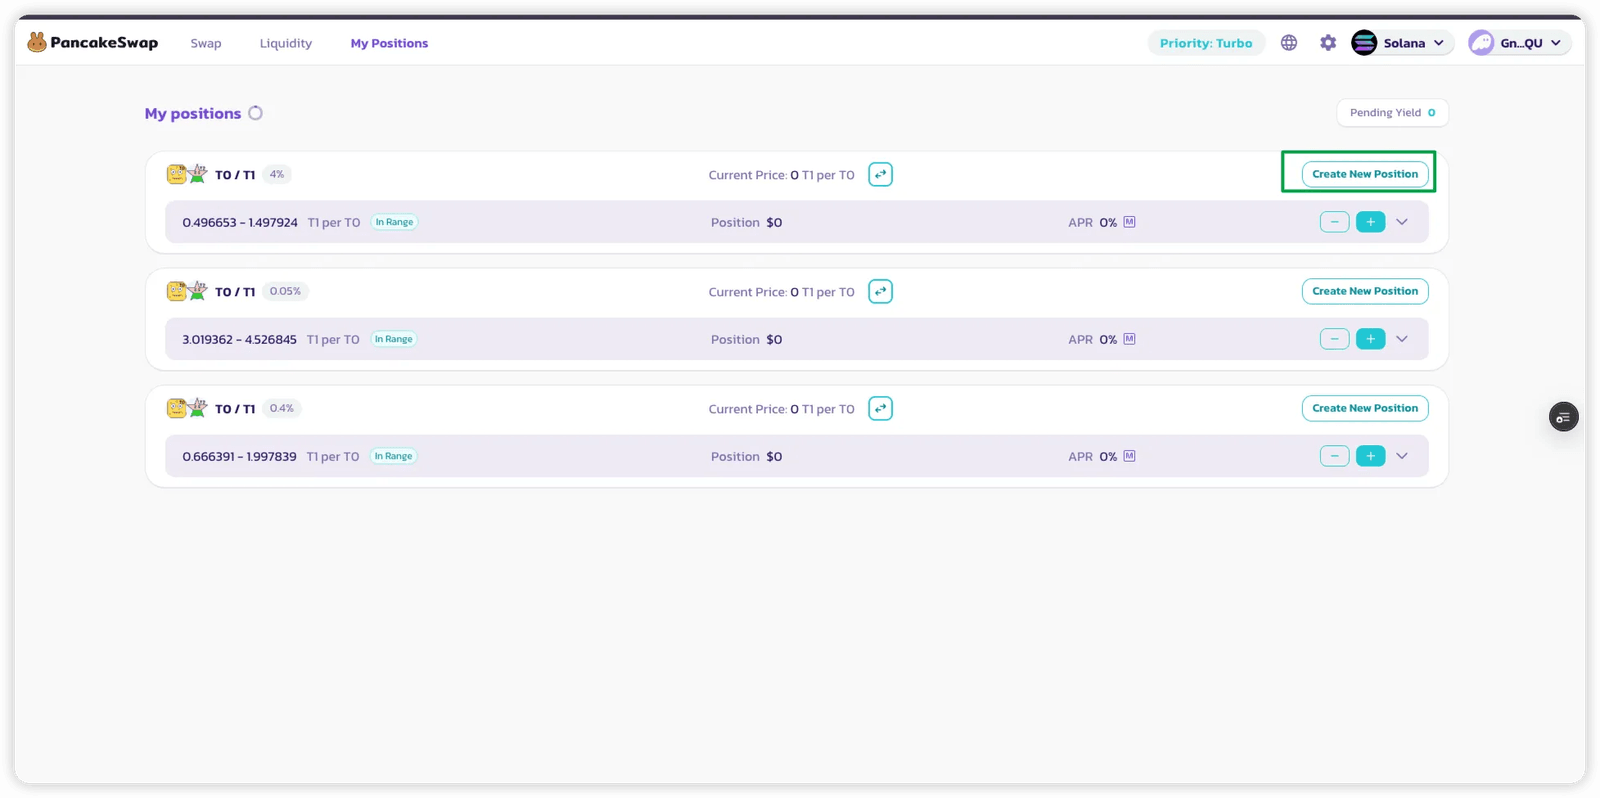
Section titled “Step 3: Choose How You Want to Add Liquidity”You can start the process by either:
-
Clicking “Deposit” on the pool card
-
OR clicking “Create New Position” under “My Positions”
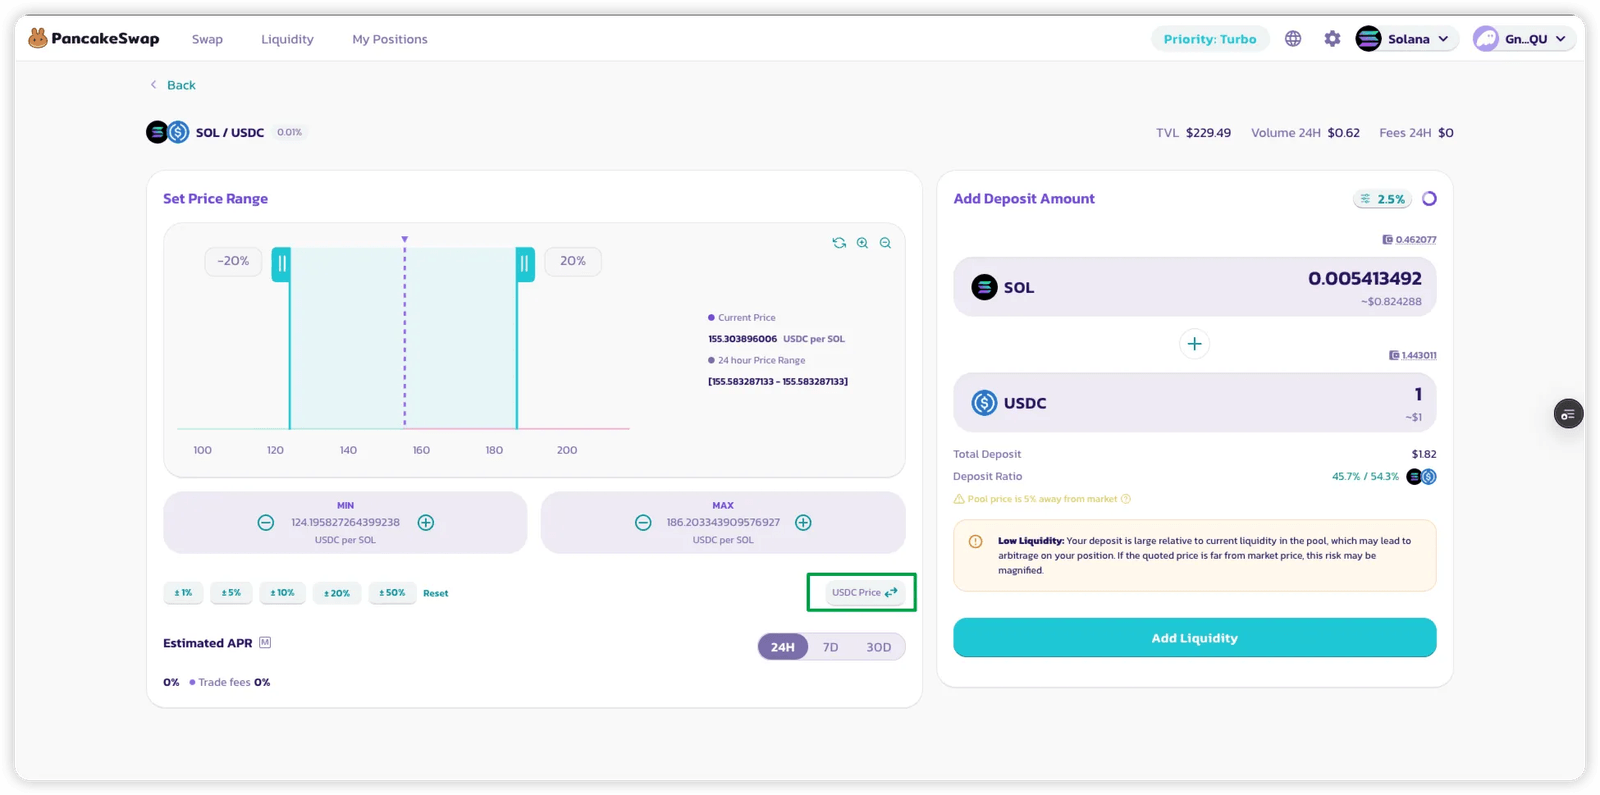
Step 4: Set Your Price Range
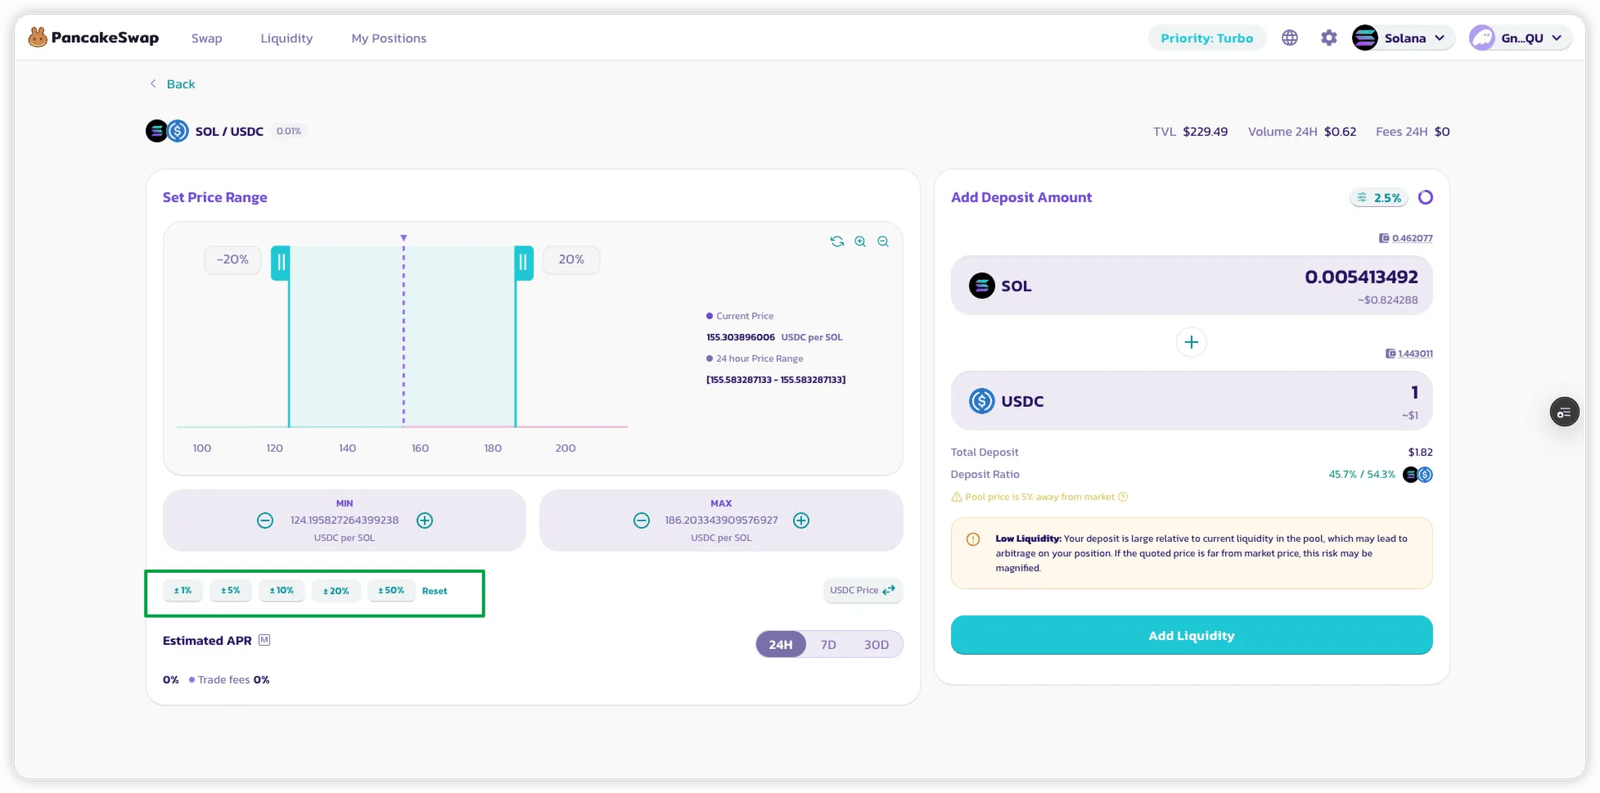
Section titled “Step 4: Set Your Price Range”Since this is a V3 pool, you’ll need to choose a price range for your liquidity:
-
Use quick preset ranges (e.g. +- 25%) or set a custom range
-
Use the price direction toggle to switch between base/quote view
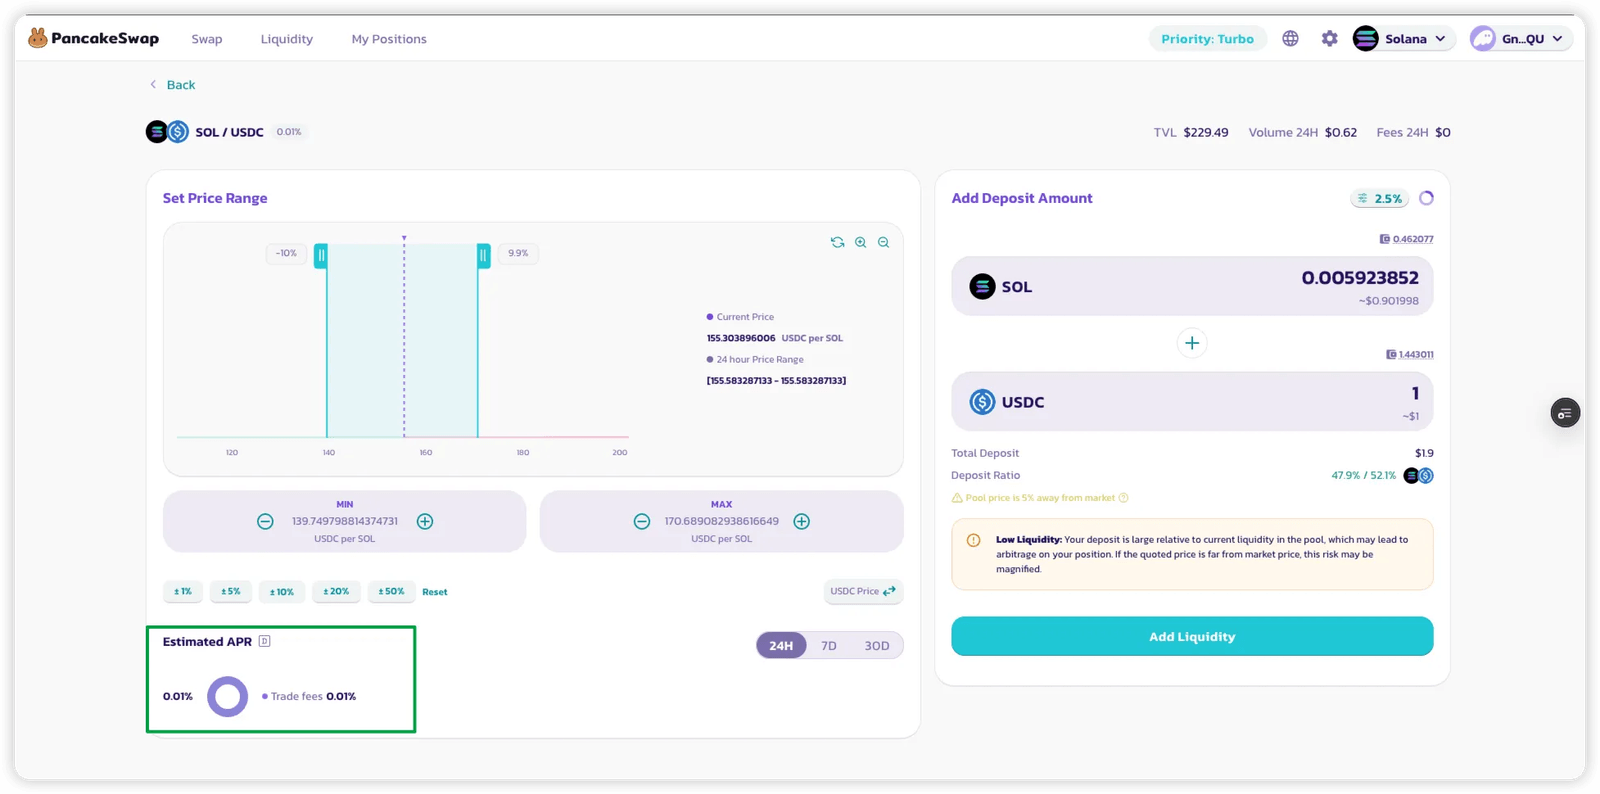
Step 5: Enter Deposit Amount
Section titled “Step 5: Enter Deposit Amount”Input the token amounts you want to supply
** APR won’t appear until you’ve entered amounts for both tokens
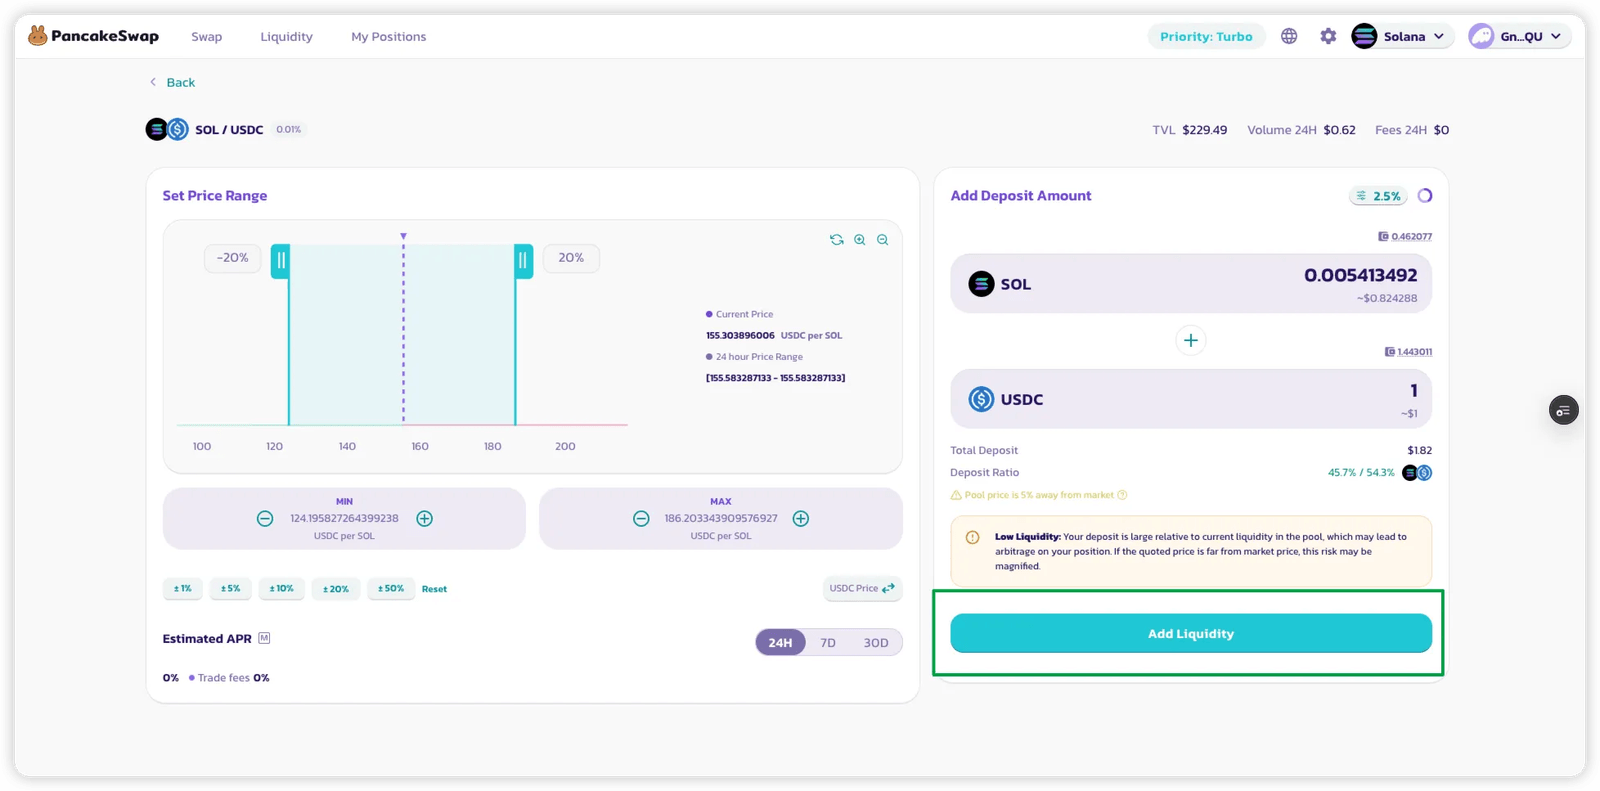
Step 6: Preview & Confirm
Section titled “Step 6: Preview & Confirm”-
Click “Add Liquidity”
-
Review your position in the preview modal
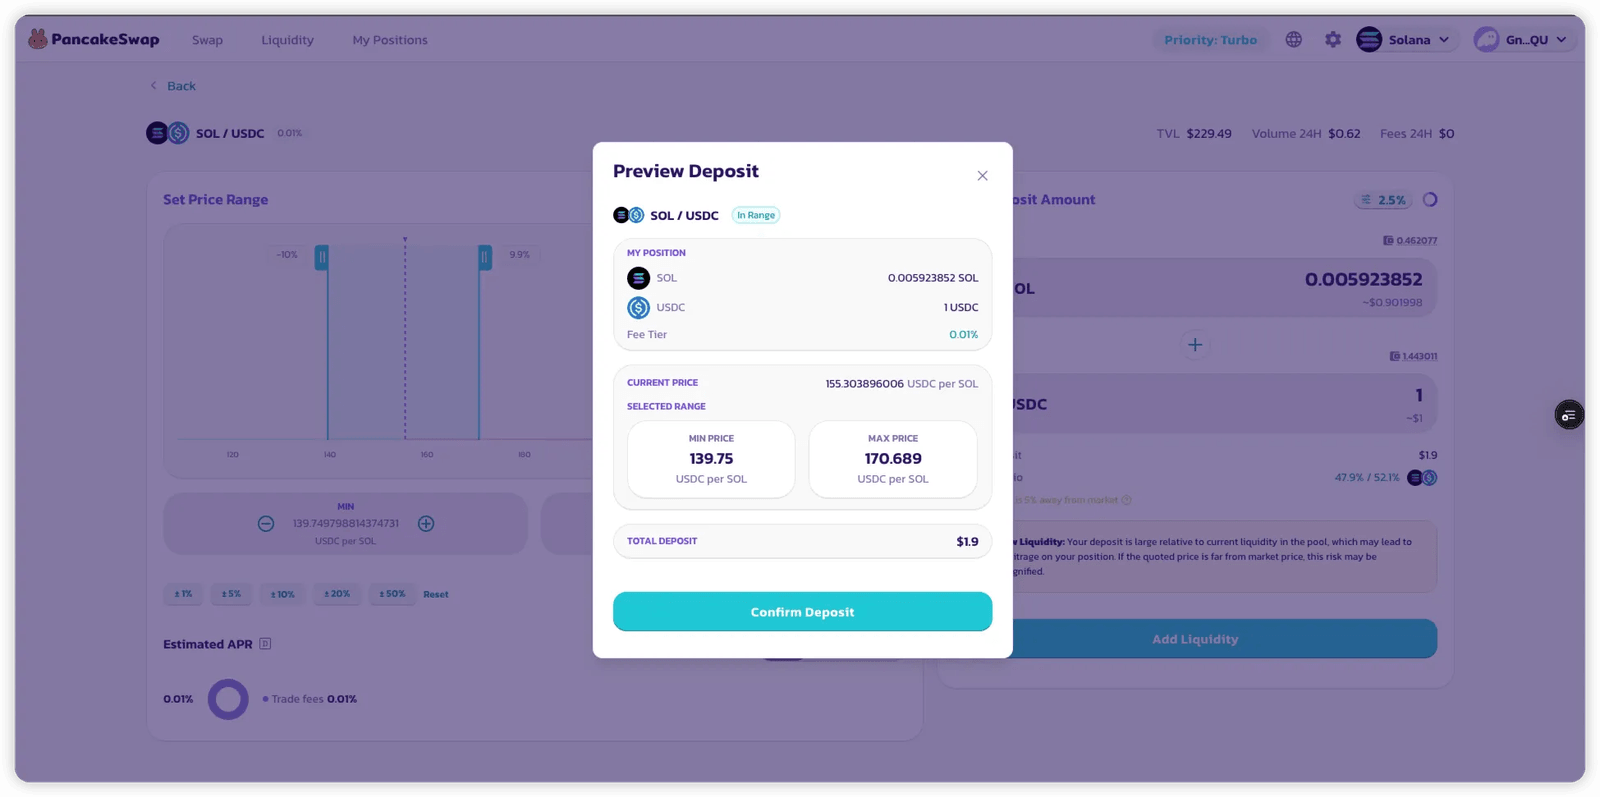
Once confirmed, the transaction will be submitted, and your position will be created!
Option 2: Add More Liquidity to an Existing Position
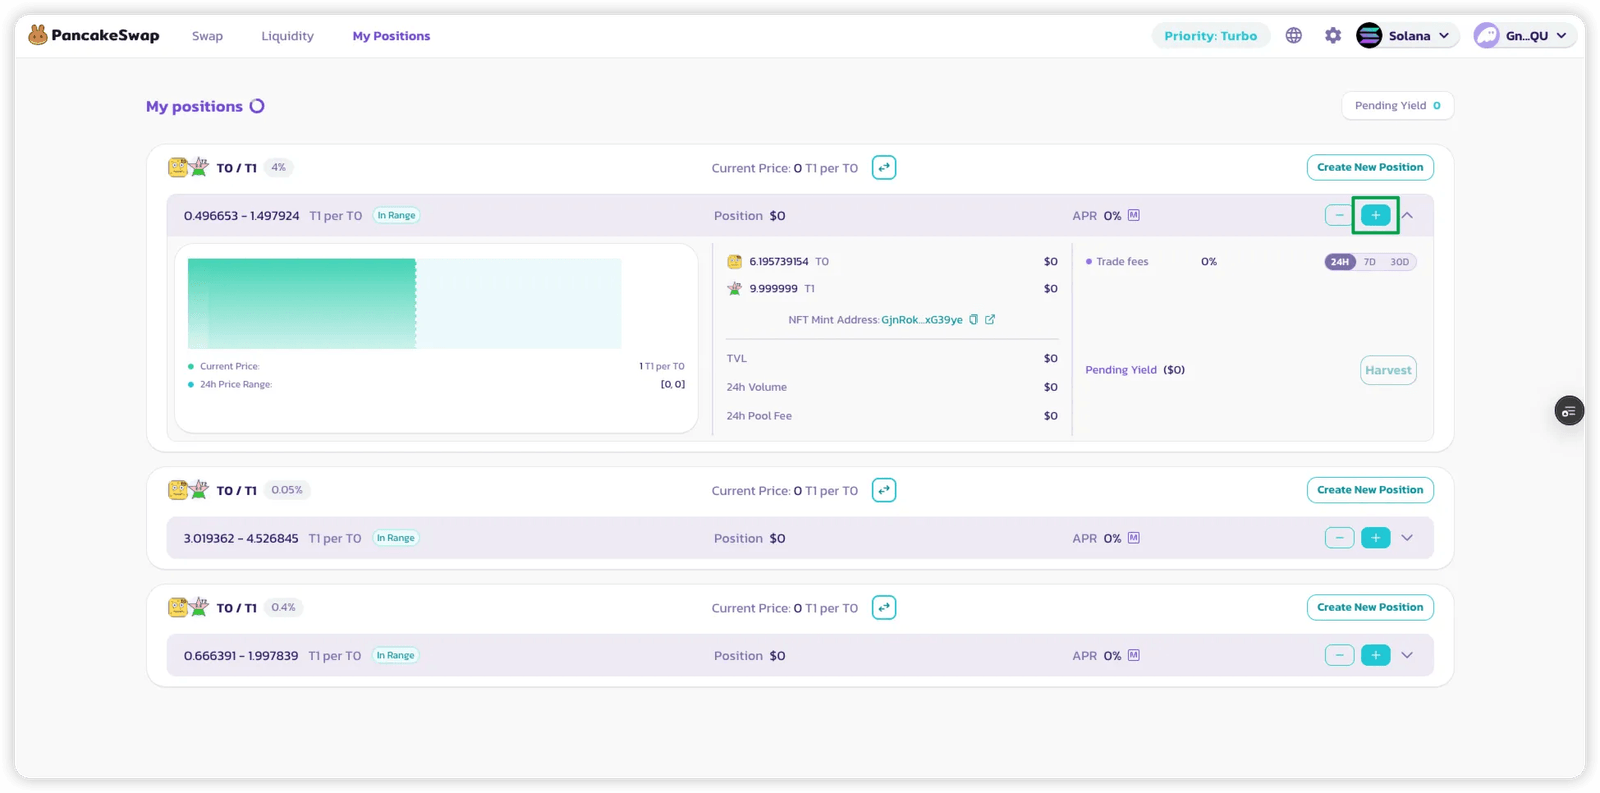
Section titled “Option 2: Add More Liquidity to an Existing Position”Step 1: Go to “My Positions”
Section titled “Step 1: Go to “My Positions””Here you’ll see all your active V3 liquidity positions.
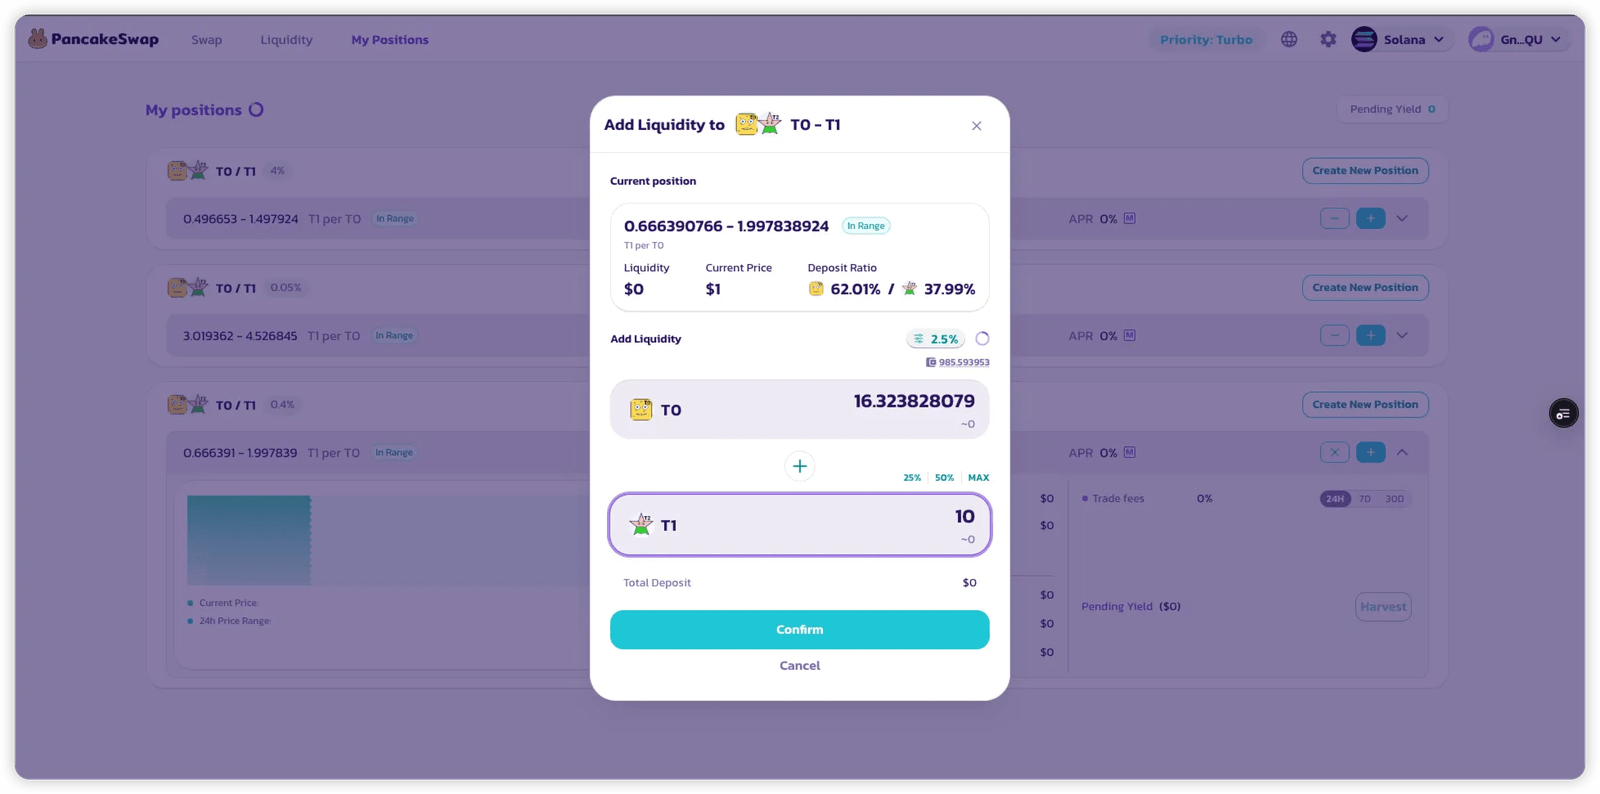
Step 2: Click the “+” Button
Section titled “Step 2: Click the “+” Button”This lets you add more tokens to your current price range.
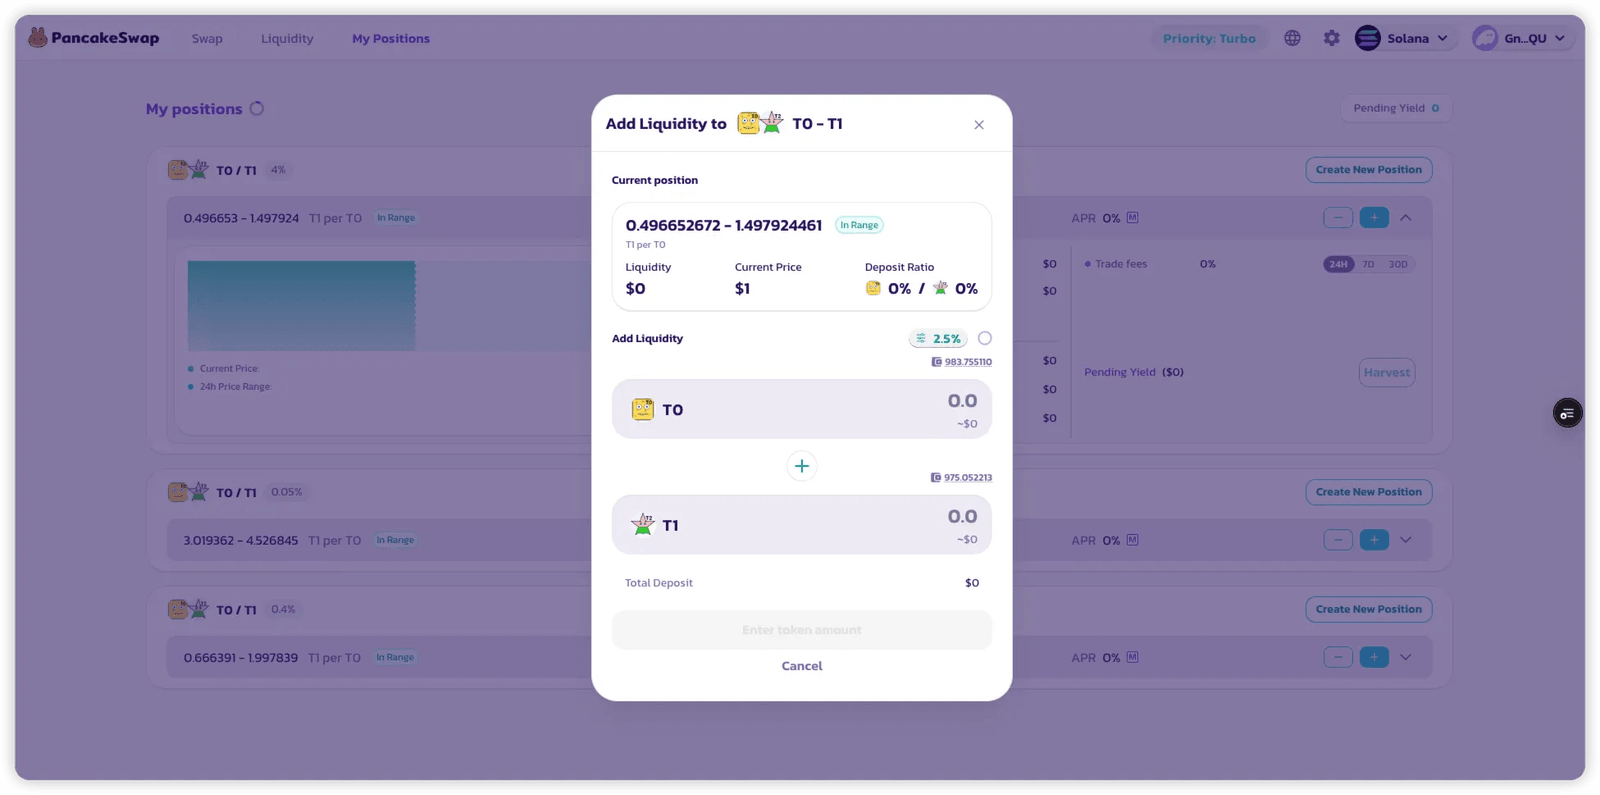
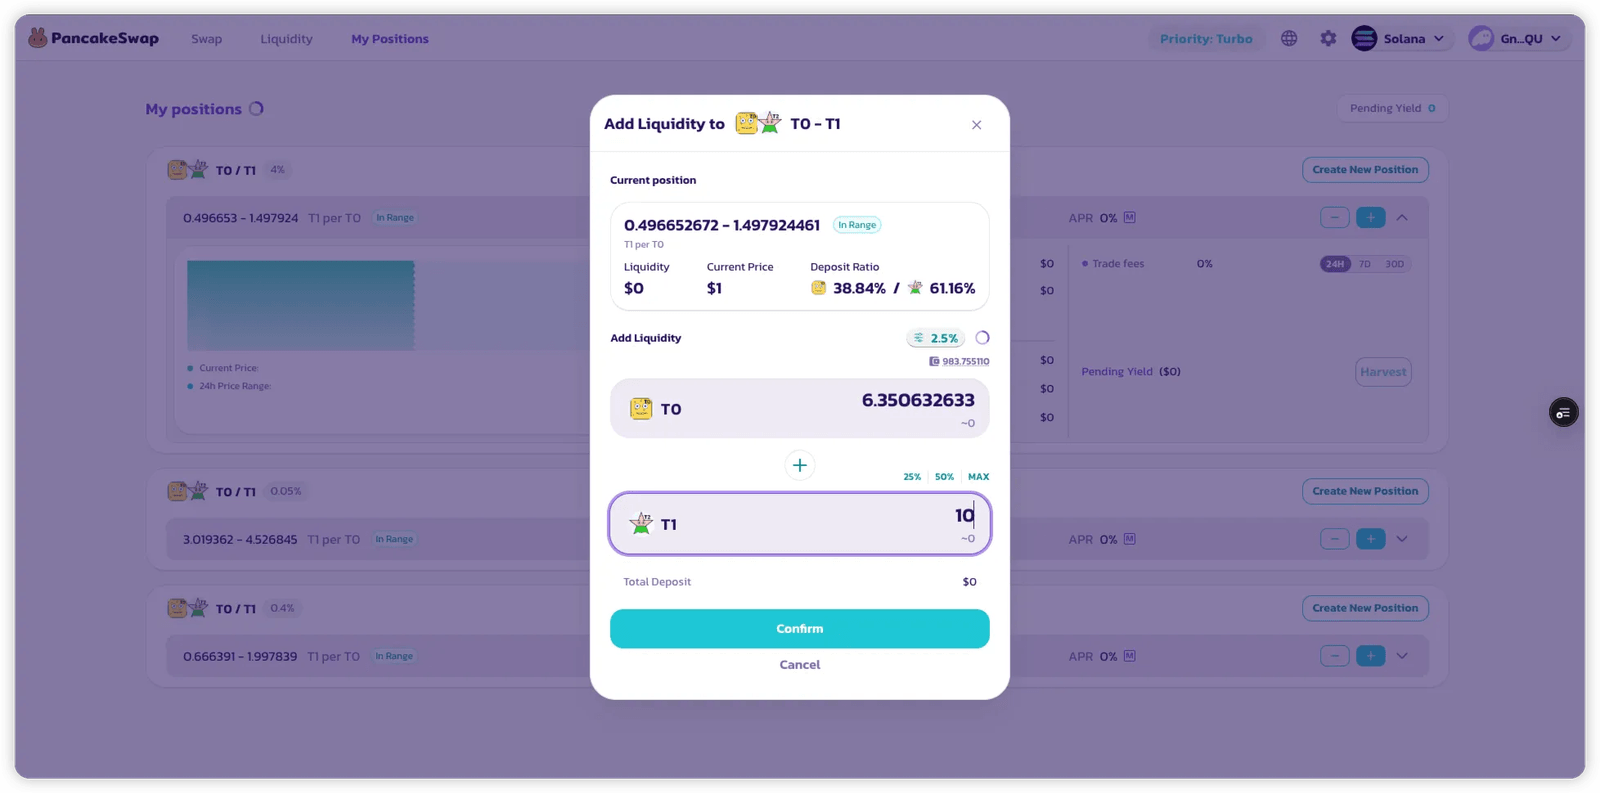
Step 3: Enter Deposit Amount
Section titled “Step 3: Enter Deposit Amount”Add the token amounts you want and click “Confirm”.
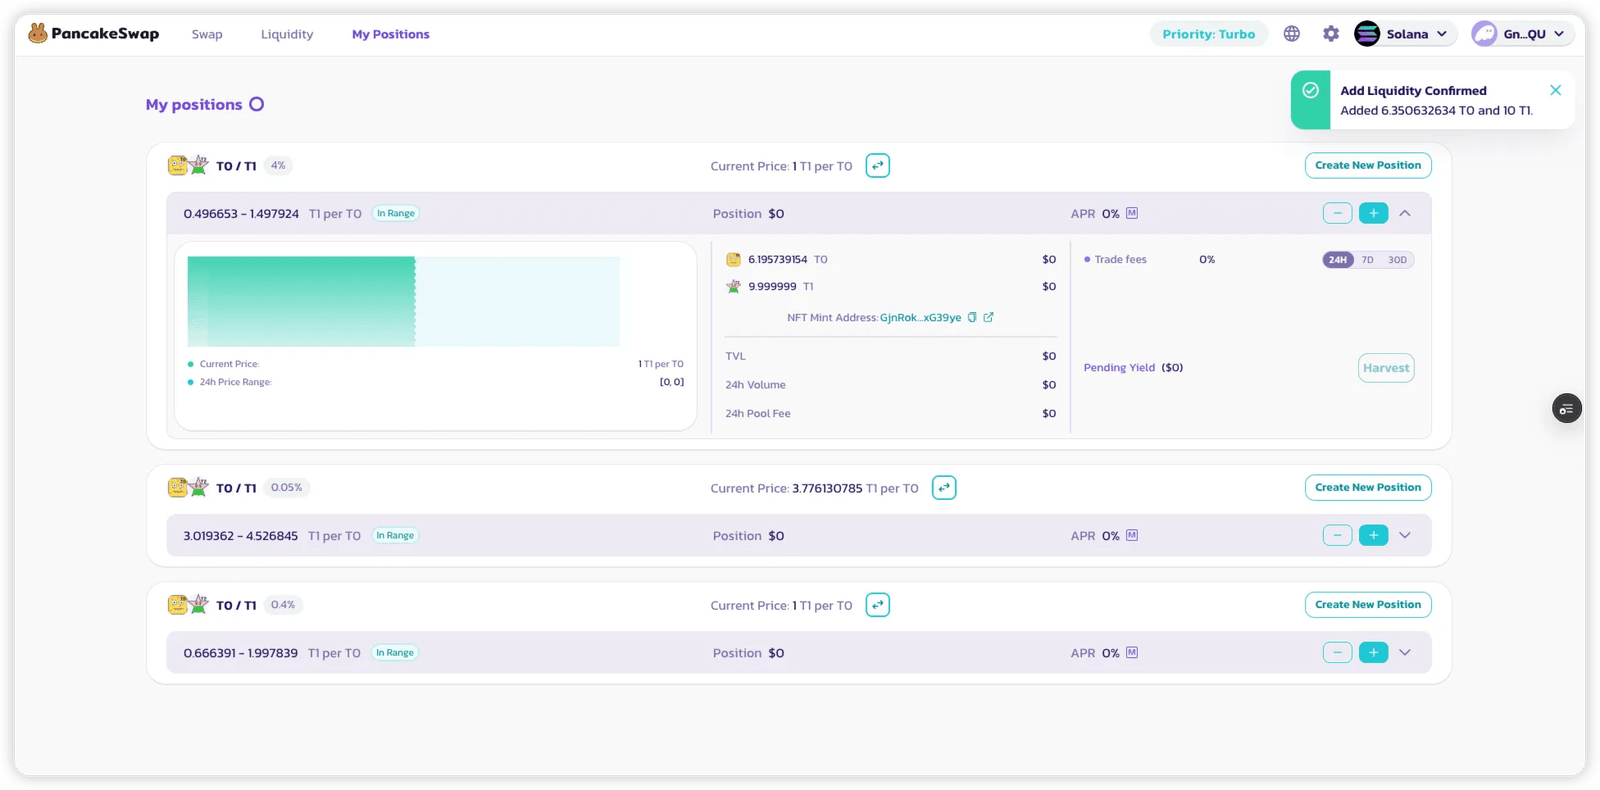
You’ll see a success message upon confirmation.
Remove Liquidity
Section titled “Remove Liquidity”You can remove liquidity from any of your active positions directly from the My Positions tab.
1. Go to My Positions
Section titled “1. Go to My Positions”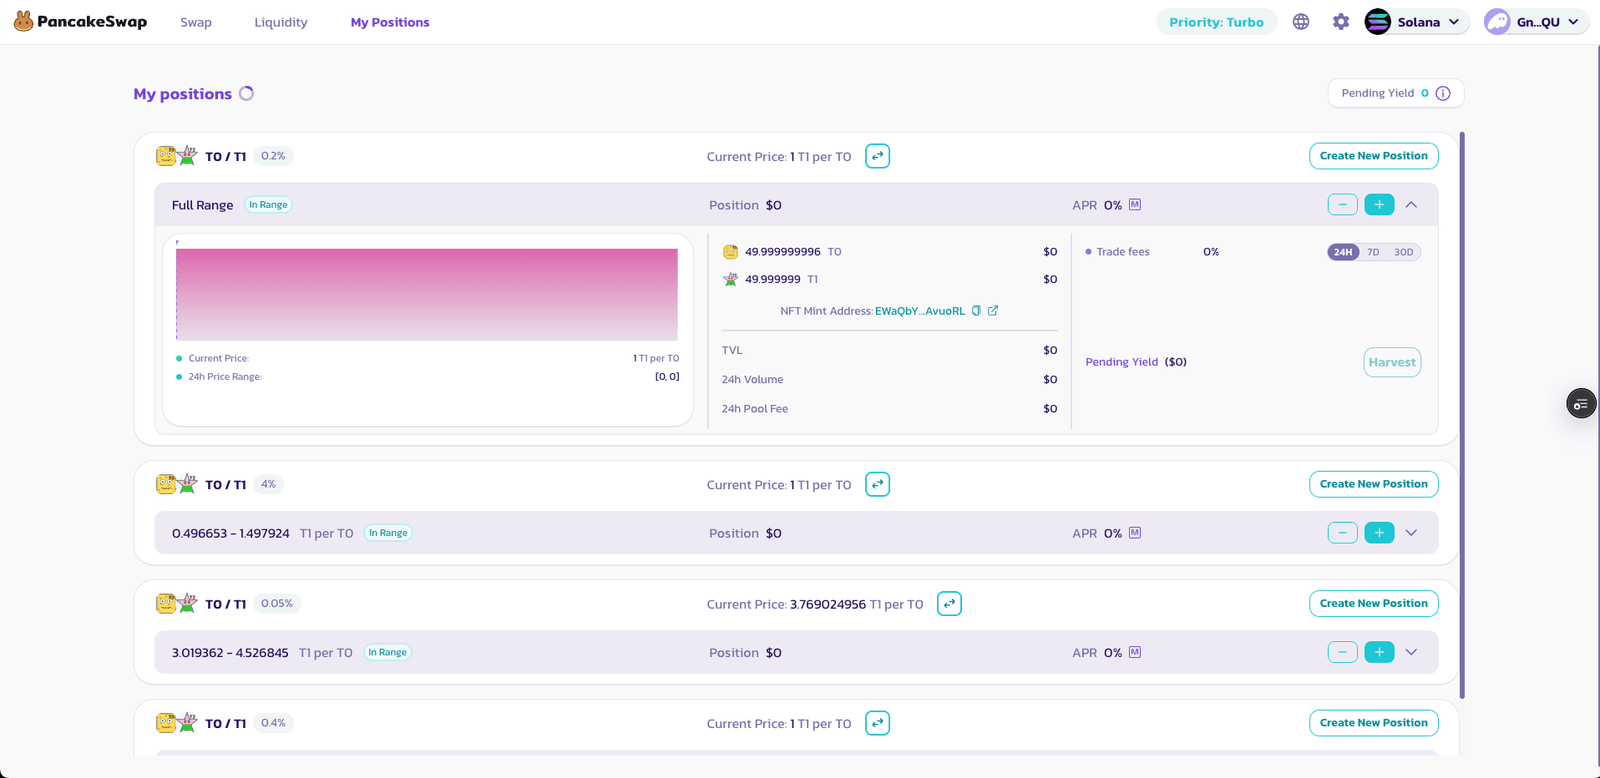
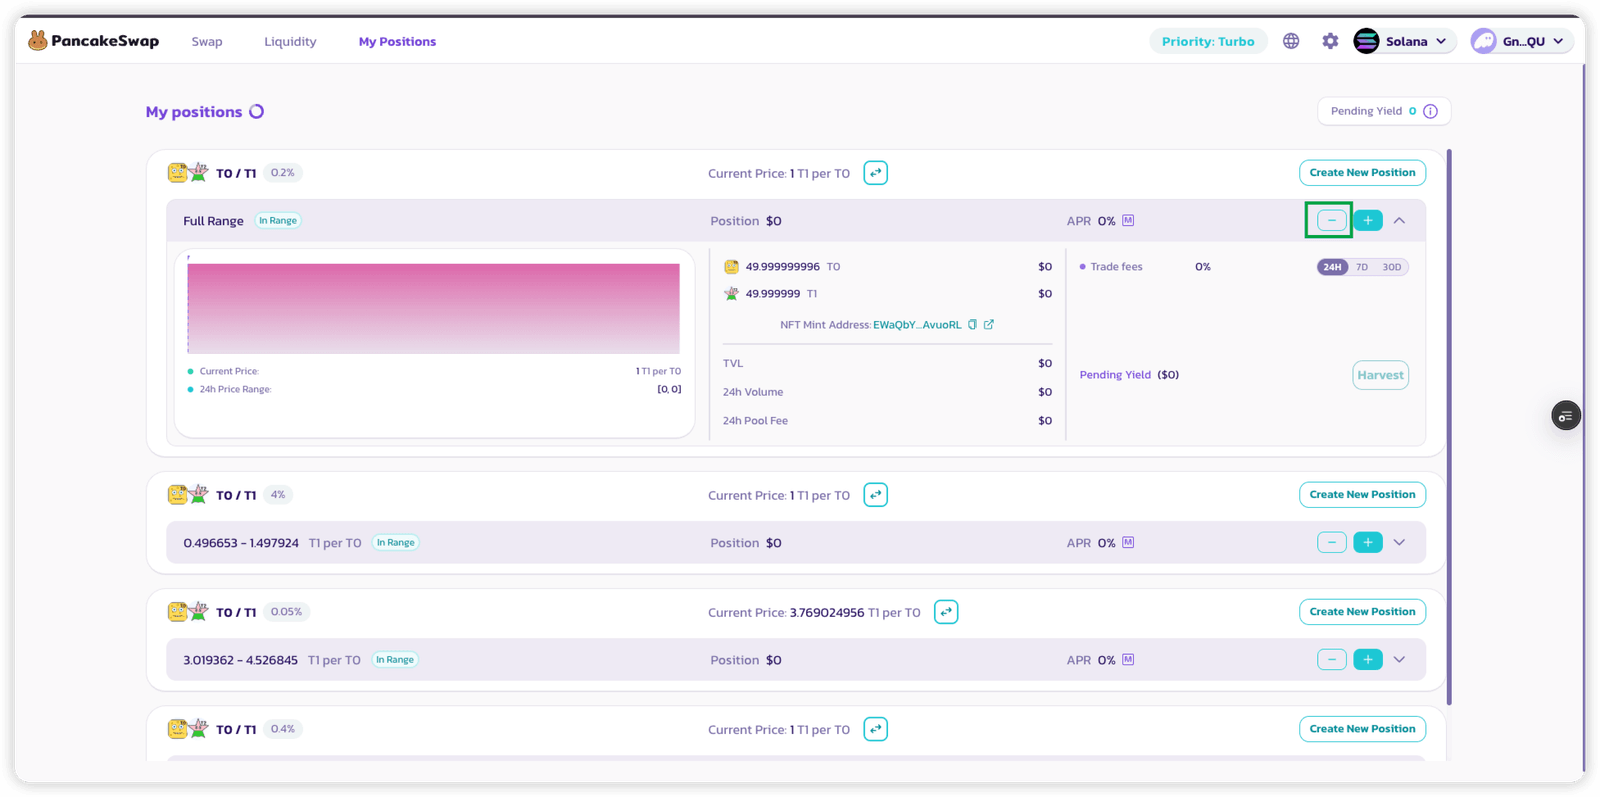
2. Select the Position You’d Like to Remove Liquidity From
Section titled “2. Select the Position You’d Like to Remove Liquidity From”Click the “−” icon next to the position.
3. Enter the Amount You Want to Remove
Section titled “3. Enter the Amount You Want to Remove”You can either:
- Manually input the token amounts
- OR use the slider to select a percentage of your current position
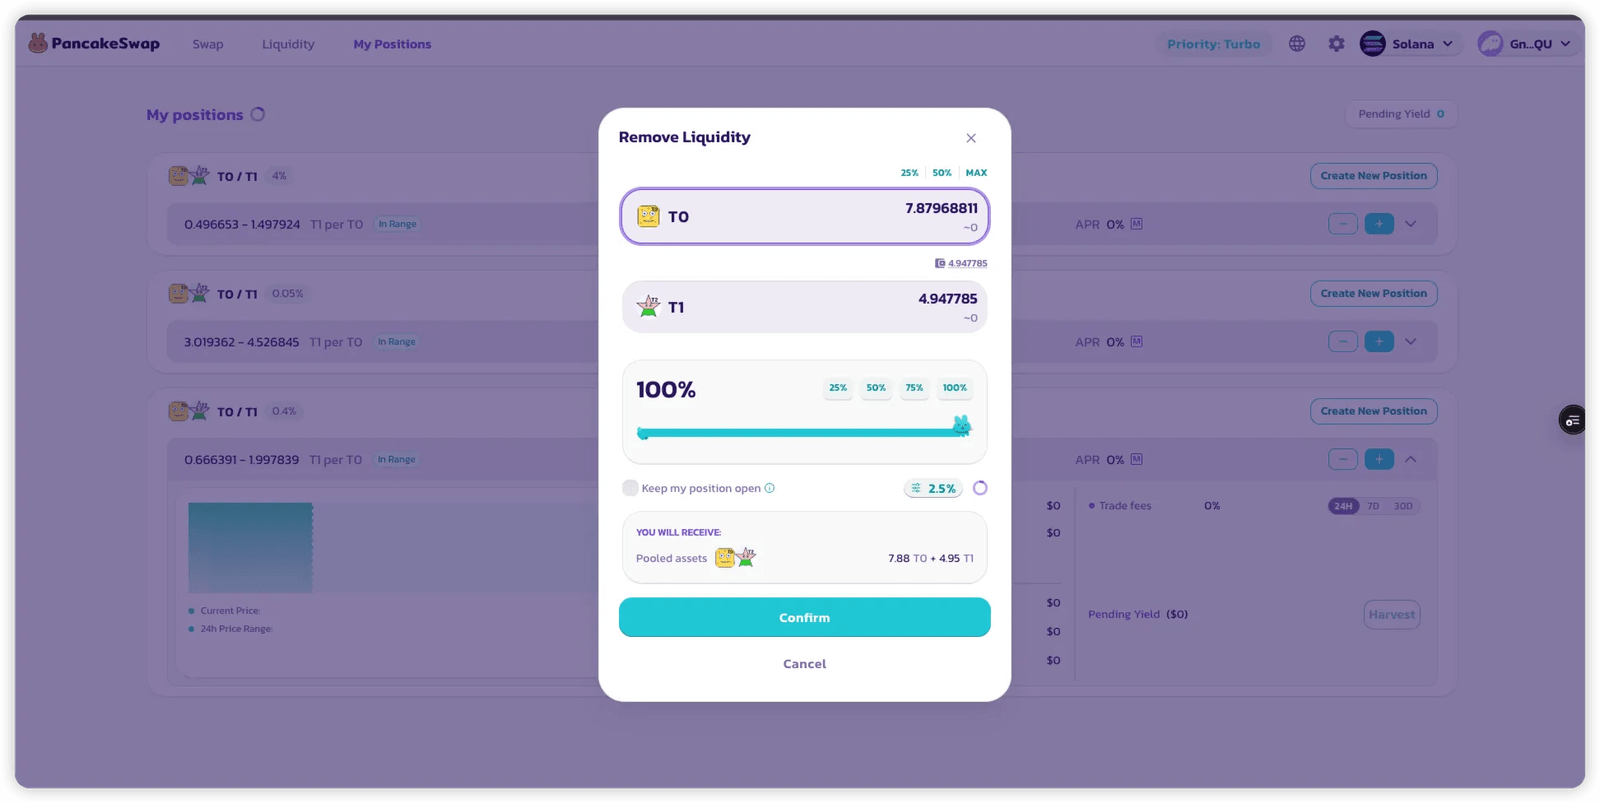
4. (Optional) Keep Your Position Open After Removing Liquidity
Section titled “4. (Optional) Keep Your Position Open After Removing Liquidity”If you select “Keep my position open” when removing 100% of your liquidity:
- Your tokens will be withdrawn
- But the position’s history and your original price range will remain visible under My Positions
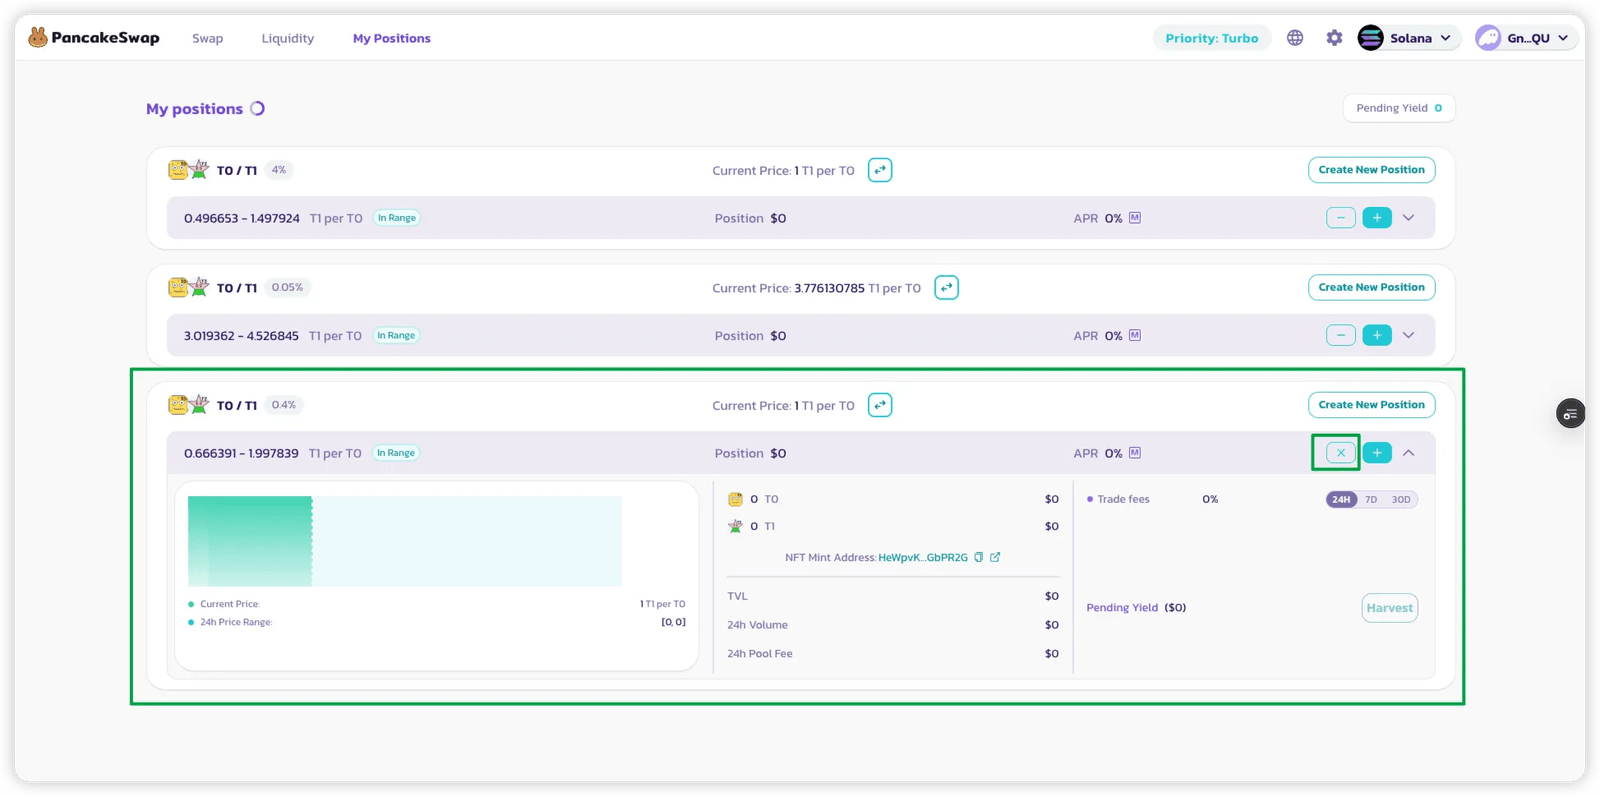
If you wish to completely close the position, including its price range display:
- Click the “X” icon
5. Reuse the Same Price Range
Section titled “5. Reuse the Same Price Range”You can also add more liquidity to the same price range later, following the same steps as when you first added liquidity.